Quick tip for those of you who’re as obsessed with mesh quality as I am.
Introduction
Getting highlights right can be pain in the ass, right? Some of you tweak the models without any analytic tools, some of you rely on zebra or even curvature shader. And then there is the IsoAngle shader which rules them all. But can you get one in Maya and how does it even work?
Theory
The theory behind IsoAngle shader is actually super simple. It displays an angle between vertex normal and a reference vector as a color value. Angle between these two vectors can be calculated as:
α = acos( ( v · w ) / ( |v|·|w| ) )
Here I’ve decided to cheat a little because we don’t really need the exact angle. All we need is a number between 0 and 1 to use for UV mapping. Since that’s what we get from dot product of two normalized vectors, we simply used the following equation.
a = v n · w n
The following picture illustrates use of vector dot product to pick color values of a texture.

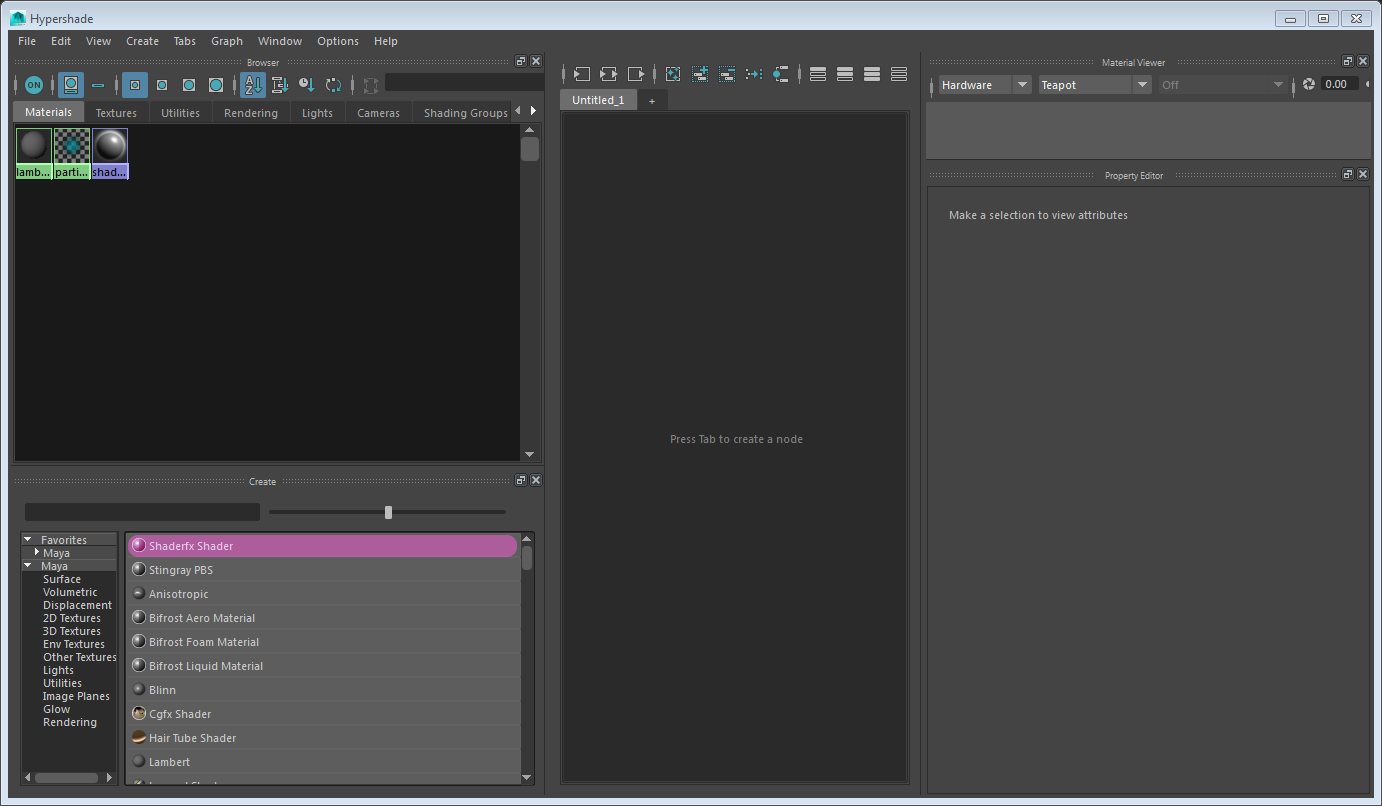
How to make one
We’ll use shaderFX since it provides an easy way to access surface normals and all the other functions we need. First make sure the shaderFXPlugin.mll is loaded.

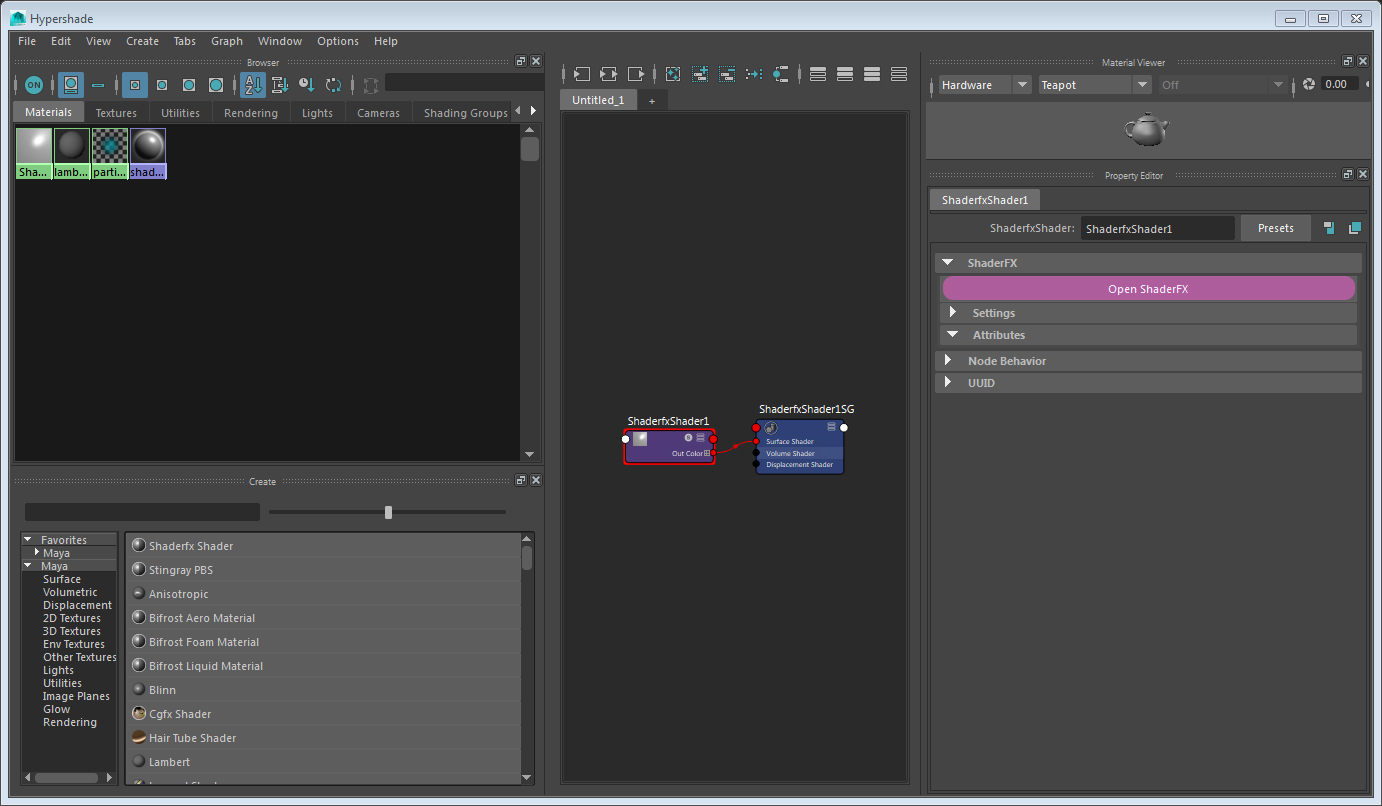
Go to Hypershade and create a ShaderFX Shader.
Unlike the other Maya nodes, the internal ShaderFX nodes don’t show in the Hypershade. We’ll have to work with them in the ShaderFX interface which can be accessed through Open ShaderFX button.
Inside ShaderFX
This is where the magic happens (You might need to go in Settings>Show Property Panel to get easier access to node properties)
Let’s first of all create a Vertex World Normal node. This node provides vertex normals of the mesh which has the current ShaderFX applied on. Next we’ll need a Vector Construct which will serve as a reference vector for our shader. Let’s say we want to measure angle between vertex normals and Z axis (x = 0, y=0, z=1). You can later play with these values to evaluate the mesh from different directions.

We’ll use Dot Product to measure the projected length of our vectors, but first we have to Normalize them to make sure the result will be somewhere between 0 and 1. Once we have the result, we can feed it in another Vector Construct to create UV coordinates for the TextureMap.

Last step is not necessary but it will make the shader nicer by setting the specular color to black.

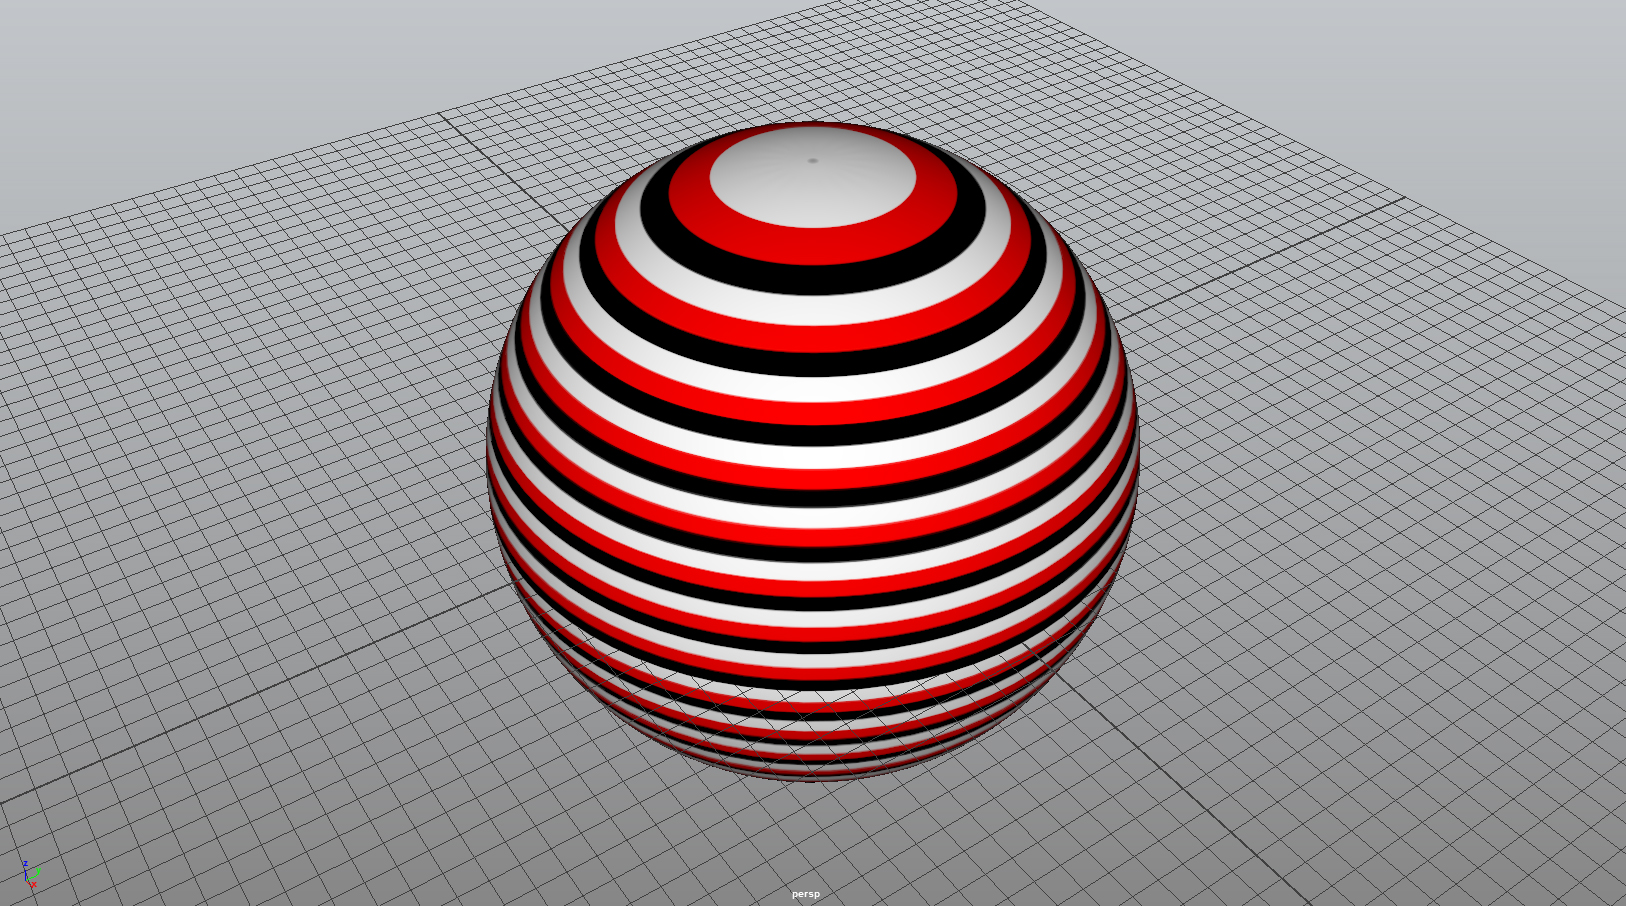
Thats it! The shader is ready to be assigned to your mesh.
2 Comments
hao
30 Mar 2018 - 3:27 amhello is this isozebra can flow follow the persp cam like rhino zebra??
Stepan Jirka
30 Mar 2018 - 6:42 amHi Hao,
That’s not quite point of this shader. If you’re looking for a alias-like zebra shader you can easily make it with standard Lambert shader by applying EnvBall to its color. EnvBall needs to have zebra stripes as a texture file and both Reflect and EyeSpace ON
Best regards
Štěpán